
Climate Victory Gardening for Beginners
Whether you’re a beginner gardener or a seasoned gardener revisiting the basics, here's how to successfully grow a Climate Victory Garden.

Whether you’re a beginner gardener or a seasoned gardener revisiting the basics, here's how to successfully grow a Climate Victory Garden.
Everyone, including beginner gardeners, can grow food, pollinator habitats, and healthy soils, whether you have a huge plot of land or live in a tiny urban high rise. Together, it's the collective action of Climate Victory Gardeners across the country (and world!) that has the potential to move the dial and be part of the climate solution.
It's easy. If you have a garden, you're likely already using some of the Climate Victory Garden practices. (If you're brand new to gardening, check out these five steps to starting a garden.)
Our #1 tip for beginner gardeners is to have fun and not take the process too seriously. Gardening is like a big experiment, and even the most seasoned gardeners have lots of opportunities to learn from their mistakes. These resources will get you started and set up for success.
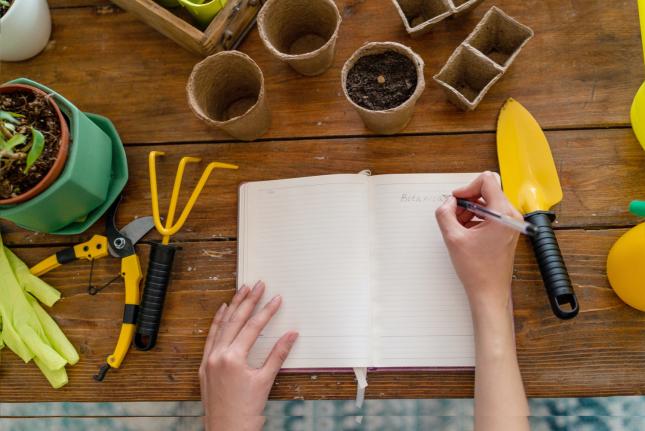
Each of us has our own garden vision, and this is the perfect place to start your garden journey.
Take time to think about your dream garden. What do you see? Consider drawing or writing about it (this will help you later on!).
Set garden goals and keep these in mind throughout the rest of your gardening process—maybe your top priority is growing great tomatoes to save money on groceries, getting your kids outside to grow food, or creating a habitat for pollinators.
Garden planning is essential for success and ensures you're making the right decisions for your Climate Victory Garden to have the greatest impact on the climate and your local ecosystems. It’s one of the most important and involved parts of the gardening process, especially when you’re considering carbon capture.
These beginner gardener resources can be viewed as a sort of timeline: choose a location; test and prepare you soil; figure out what, how, and when to grow; and maintain your garden throughout the year.
Read the beginner gardener toolkit for more about the 5 steps to start a garden.
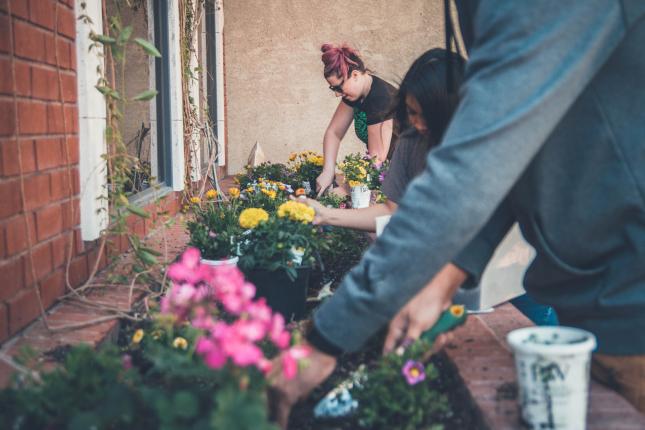
If you can, choose a garden location that's visible from your kitchen window and is close to a water source, so you’re reminded to harvest, water, and care for your garden often. Consider zoning laws, HOA restrictions, and previous (possibly) toxic uses of your property and its soil. Discuss options with your landlord if you’re in a rental.
Observation is an important step before breaking ground and will ensure greater success down the line. Spend some time watching how the sun and shade move across your property during different times of day, keeping in mind that many plants need at least six to eight hours of direct sun each day. Notice areas that are breezy or protected, knowing that most plants don’t enjoy being pushed around by the wind. Go out after a heavy rain to see if the water is diverted from some areas or pooling in others, because many veggies are thirsty but can suffer without good drainage. Observe critters—including those that want to eat your garden, like deer—and garden helpers like bees.
If you don’t have a lot of space, get creative with what you have, and look for places to plant along fence lines, between sidewalks and curbs, and open areas in your neighborhood. You might plant food amongst your existing ornamental landscaping. Want to convert a lawn? Check out this technique.
Dealing with lots of shade? Some plants prefer shade (read your seed packets!), but you’ll likely struggle to grow fruits and vegetables if your yard get less than two hours of sun during the day. Similarly, if you face limitations due to toxic soils, stubborn landlords, or just a lack of open space, consider growing in containers outdoors or even indoors. Community gardens, local farms, and helping friends and neighbors in their gardens are also good options if you don’t have land to grow on.
Read the beginner gardener toolkit for more about choosing a location for your garden.
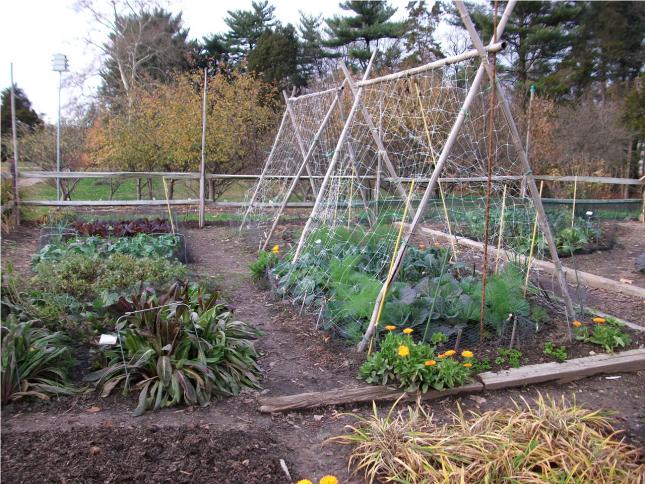
It’s important to assess your time and availability during this step—be realistic. A container garden is best for those with just a few minutes a day. For those with two to three hours a week, a small raised bed might be the option. Don’t go too big on your first garden, they can be more work than expected (try 10 square feet if you’re a first-time gardener).
The maximum width of beds should be around four feet or narrow enough for you to reach the middle to weed and harvest. Length will depend on your space, but eight to ten feet gives you plenty of room to access the garden from all sides. Square four-foot beds can be ideal for small spaces and gardening with children. Consider how you’ll access all parts of larger beds or garden spaces and add pavers or pathways, so you don’t compact growing areas or inadvertently step on germinating seeds or small seedlings.
Incorporate pathways wide enough to walk down once your plants have grown large. Give yourself more room than you expect—at least two feet wide. Transfer soil from paths to beds to build them up and delineate clear walking areas. Where possible, use permeable materials if you want a “paved” walking area.
If you’re short on space, consider growing “up” with plants that climb trellises and have a small garden footprint to allow you to grow more food in the same square footage.
When determining the best layout for your garden, start with a simple sketch. Physically measure or estimate the dimensions of your area and get it on the page (it doesn’t have to be pretty). You might use the ratio of 1 square inch on the paper to 1 square foot in the garden. Read about plant spacing on seed packets or online and sketch a layout that works for what and how much you want to grow.
Use your sketch as a guide when planting this year and keep it to ensure you’re rotating plants next year. Consider companion planting in the future, once you feel comfortable experimenting with some more advanced practices. These advanced planning practices help your plants succeed without costly external inputs like fertilizers and pesticides that have negative impacts on the climate—and they all rely upon strategic layout and planting techniques.
Read the beginner gardener toolkit for more about choosing your garden's size and layout.
Most of us don’t know the entire history of our homes and the land they’re built on. And, renters likely know even less. In some cases, your yard may have had uses in the past that make it unfit for growing food altogether. Your home may have been painted with lead paint that flaked off. Or, there could have been potentially polluting industry near your home and garden.
If you have any question, it’s best to test.
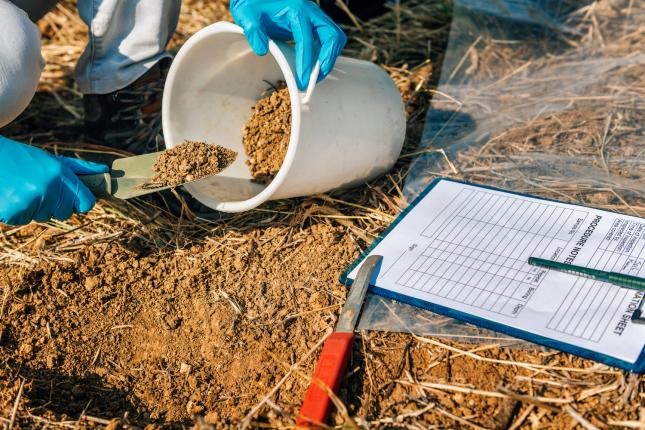
Soil testing can give you information about possible contaminants and toxins. It's great for learning what nutrients and supplements your soil might need to produce a healthy and successful garden too. Climate Victory Gardeners can request additional soil carbon testing alongside the basic kit to measure their climate impact after they've adopted carbon-capturing practices.
You can often find soil testing kits at local agricultural extension office associated with a state university, even if that university is hundreds of miles away. You can also contact the university or lab directly to have a soil testing kit mailed to you (find the contact info for your nearest office here). While you may be able to find kits online or at local garden and hardware stores, we suggest going through a local university to ensure the tests are conducted in professional labs.
The kit consists of a simple plastic tube or bag and instructions on how to collect the soil.
Early spring is a great time of year to test your soil. It’s best to do it when the ground is thawed and digging up the samples won’t disturb growing plants. But really, you can do this just about any day of the year.
Learn more about the details of what you can expect from testing your soil—including tracking soil carbon for your Climate Victory Garden.
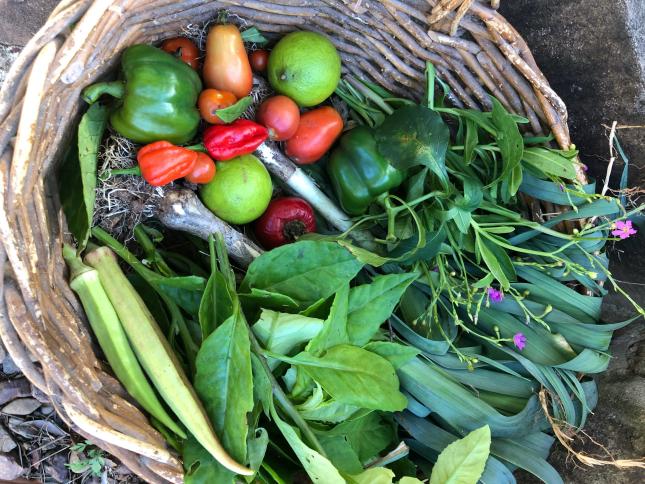
Make a list of what to grow based on what you like to eat. Start simple, with the “must-haves,” just like you would if you were trying to find a new car or place to live. Don’t waste time growing things you think you “should” eat. And check to see which veggies grow well in your area. Ask neighbor gardeners what grows well for them. A lot of time and effort will go into your garden, so grow the veggies you love and those that will thrive where you are.
If you have a great homemade salsa or tomato sauce recipe, look at the ingredients to see what you can grow. If you’re particularly fond of a unique or expensive herb, spice, or vegetable, see if you can grow it. Have friends, families, or neighbors also gardening? Plant foods that complement their garden for future trades, when you just can’t eat another zucchini.
Some foods have bigger climate impacts than others. Check to see if your favorite exotic fruits and veggies can be grown in your area. If so, you’ll eliminate countless food miles and the emissions associated with transporting food around the world to get to your plate. Some plants are also better at capturing carbon underground than others. Choose deep rooted, perennial plants that do this best—berry bushes and trees for example.
Be sure to include some of these easy starter plants: peas, beans, radishes, lettuce, and sunflowers. These plants all grow quickly and are ready to harvest quickly too—leaving less of a chance for pests, weather, or lack of attention to interrupt. Squash are also great for the beginning gardener, but beware that they need a lot of space. Most herbs are also good options because they can be harvested anytime.
Many plants come in an array of varieties to suit your taste and your space. For example, some beans come in bush varieties (good for small spaces and containers) and vining varieties (good for climbing up trellises and have a small garden footprint).
The US is divided into zones based on what types of plants grow best. Find your zone on the USDA website. The back of seed packets will tell you which Plant Hardiness Zones are ideal for growing that particular variety—be sure to pick plants that will thrive in your zone, which takes into account temperatures, season length, and humidity.
Choose native varieties and seeds adapted to your area when possible. They’re more likely to thrive without climate-negative, synthetic chemicals and are also more resilient in the face of our changing climate.
Read the beginner gardener toolkit for more about deciding what to grow in your garden.
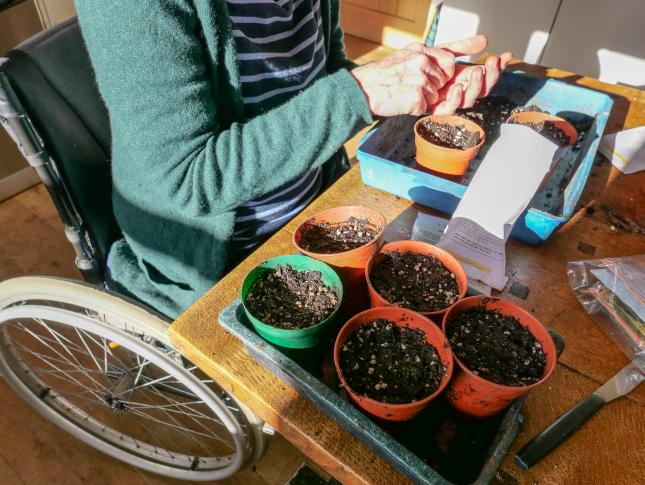
There are pros and cons to consider when choosing between starting your garden with seeds or transplants (also known as planting seedlings).
This option is easier and quicker than starting from seed, because you’re buying a seedling that’s already several weeks old. It’s past its most vulnerable stage and has been given the resources it needs to grow into a healthy mature plant. Because of this, it’s also more expensive to buy seedlings.
You can find seedlings at your local nursery. Quality may be an issue, so check closely for pests and signs of stress like wilting or damaged leaves. Ask the vendor if chemical pesticides or fertilizers were used on the plants; it’s always best for your health and the climate to buy organic when possible. Support local farms and small green businesses when you can.
Starting from seed saves you money and often offers more diversity than what’s available at the plant nursery. You can find seeds at your local garden store or in one of many free seed catalogs. Choose organic and as local as possible for the most climate- and planet-friendly options. Consider buying seeds from local farms or sourcing from local seed libraries for seeds that are adapted to your specific area.
Growing from seed is more challenging and time consuming than buying seedlings. There’s more potential for issues but also more opportunities for experimentation and learning. In addition to seeds, you’ll need soil, containers for growing in, and in some cases lights and heating pads. Some seeds need to be planted directly outdoors, while others need to be started indoors. This information can be found on the back of your seed packets and our resource on how to plant seeds. During germination, seeds need to be watered at least twice a day and the soil should remain moist—a demand that can be tough to meet if you’re not at home a lot during this phase.
If you want to try growing from seeds for the first time, you might want to pick something that’s easier to grow, like lettuce and other leafy vegetables, or sunflowers.
For many gardeners, a combination of growing from seed and buying transplanting is the best option. If you try to start from seed and don’t succeed, you can often find transplants to replace them, even if late in the spring. Plant sales are great ways to support local farms and organizations, and help you diversify your garden. For both seeds and transplants, source is incredibly important. Choose companies that are committed to non-GMO, chemical-free, organic, sustainable, and/or responsible growing.
Some plants need to be started indoors, while others need to spend their whole life outdoors. Some are resistant to frost, and others need cozy soil temperatures in the 70s or higher. This tool from the Old Farmer’s Almanac provides a general planting calendar and information on which plants should be started indoors vs outdoors based on your zip code. Write the details directly on your seed packets or on a list for your future reference.
It’s important to know your local freeze dates too. This will help you determine when to plant in the spring. The back of your seed packet will have language like “plant outside two weeks after last frost” or “start indoors three weeks before last frost.” If you live in an area with a short growing season (i.e. a short summer), avoid plants that may not mature before the first freeze in the fall.
Maturity dates are found on the back of seed packets. Subtract the number of days to maturity from your fall’s first frost date to determine when to plant that specific variety.
As the climate crisis increasingly affects local weather patterns, expect for these average frost dates to vary and plan for possible losses by planting more than you think you might need.
Depending on what you’re growing and where you live, some seeds will have to be started indoors and eventually transplanted outdoors, especially those that have long maturation periods and need an extended season. If you live in an area with a long winter, you will need to start most of your seeds inside so that they have the ability to mature and grow strong before planting them outside to face the elements.
If your soil quality isn’t that great, seedlings nurtured indoors the first few weeks of their life will have a better chance of survival once planted outdoors. Critters also have a tendency to pull out and snack on seeds, so seedlings may fare better in this situation too.
Starting your seeds inside is also a great option if you live in a region where you have multiple planting seasons. You can get a head start by planting your seeds indoors so that the seedlings are ready to be planted outside as soon as it’s time to transition your garden to the next season.
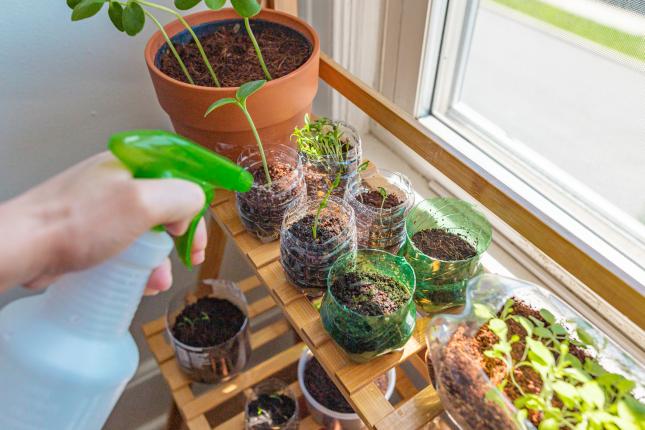
Growing from seed requires soil, containers, warmth, light, and very regular watering. Choose organic soils and containers that can be recycled—or consider repurposing supplies from your recycling bin like old yogurt containers and egg cartons. Buy or repurpose a spray bottle for watering, so as not to damage the delicate seedling stems. Water at least twice a day during germination; the soil should never feel dry to the touch. Place containers on a sunny windowsill where they’ll stay warm and get 4+ house of sunlight each day. Look into inexpensive indoor growing lights if your home lacks natural light.
Always plant more than you think you’ll need and expect some losses during this fragile phase. Share any extras you have in seedling swaps and with neighbors and friends.
Transplant your seedlings according to seed packet information or planting calendar.
If you grew your seedlings from seed at home, they’re well accustomed to the relatively consistent temperature, light, humidity levels, and lack of wind and pests indoors. That’s also the case if you’re transplanting seedlings purchased at a nursery or garden store, where your seedlings likely grew up in a climate-controlled, protected greenhouse.
Before you transplant outside, you’ll need to do what’s called “hardening off” or slowly acclimatizing your seedlings to the elements and their new outdoor home. Start with just an hour or two a day and work your way up to leaving them out overnight. When you finally plant in the soil outdoors, water thoroughly to help them settle in their new home.
Seedlings and seeds are extremely sensitive to new environments and can experience shock when planting; make sure to keep to a consistent watering schedule, feed your plants if needed, and cover them from sunlight if it’s particularly hot or sunny when you are planting.
Remember to minimize disturbance of seedling roots and garden soil during transplanting to give the plants a better chance for survival and to protect microbes so they retain carbon in your soil.
Some crops—including root vegetables and fast growers like peas—must be grown from seed outdoors because their delicate roots won’t tolerate transplanting. Seed packets will advise whether it’s best to start the variety indoors or outdoors.
If you live somewhere warm, with a very long (or even constant) growing season, consider planting seeds directly outdoors to disturb plants less in the transplanting process.
Whether you’re starting indoors or planting outdoors, don’t forget to add labels to your newly planted seeds and seedlings! Weeks or months later, you won’t remember what you planted where. A tiny melon seedling looks a lot like a cucumber seedling, but one needs lots of room to spread out and the other needs to climb up a trellis.
Create labels from repurposed or compostable materials, like popsicle sticks, which can be moved from pot to plot and reused year to year.
Read the beginner gardener toolkit for more about when and how to plant your garden.
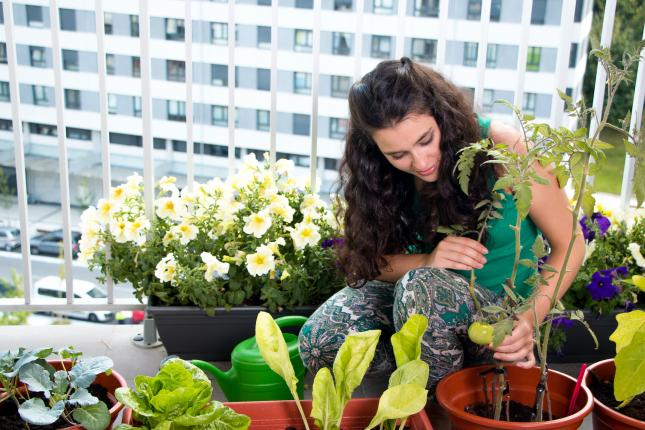
Don’t let a lack of space or an urban setting stop you from participating in the carbon capture movement. An excellent way to get your hands dirty is to sign up for a community garden. Or offer to help in someone else’s garden.
If neither is an option, you can grow food in containers using regenerative techniques like composting, mulching, and minimal soil disturbance. Containers can be placed on porches, patios, balconies, window boxes, and even indoors. Here are a few tips to get you going.
Bigger is better when it comes to pots. Especially if you're growing perennials, small pots make it hard to take advantage of these plants’ robust root structures. Root-bound or crowded plants won’t weather outdoor temperature swings well and typically need more tending. A good rule of thumb is to choose a container that offers as much space below ground as a mature plant’s foliage above ground (and, 6 inches deep at a minimum).
Many vegetables have varieties that are better suited to grow in containers, like dwarf and bush varieties. Check the back of your seed packets or ask an expert at your local garden store if you're unsure. If you grow annual plants like lettuce or tomato, you'll replant each season. Perennial plants like herbs will live for years in a container. If you're growing a perennial that won't withstand the cold, consider how you might bring the container indoors in the winter.
The biggest reason potted plants don’t fare well over time is soggy soil. Some containers come with drainage holes, but many do not. Buy the ones that do (or create them yourself!). If your pot is over six inches wide, it needs more than one hole. If you're repurposing something like an old 5 gallon bucket, drill or cut drainage holes in the bottom (large enough for water to easily escape, but small enough to not lose precious soil).
Garden soil often becomes compacted over time, and potted plants are almost impossible to aerate without damaging the roots. If you're growing food in contains, make your own potting soil mix by combining equal parts of coconut fiber, good garden soil, compost, and sand. The coconut fiber and sand prevent soil from compacting and increase drainage.
You can also buy potting soil from your local garden store. Potting soil is usually mixed with perlite or vermiculite, textured styrofoam-like pebbles, to help container soil stay loose and porous. Look for potting soil that is 100 percent organic and, if you can find it, inoculated with mycorrhizae, a fungus that works with plant roots to absorb more nutrients. Avoid soil mixes with peat due to their environmental impact.
While potted plants are resilient, they do take a little extra care. Garden plants have deep root structures that can find water and nutrients underground, but if you're growing food in containers, it's up to you to keep them moist and fed.
If your potted plant has stopped growing or the roots have pushed through the drainage holes, it’s time to repot. Find a new container big enough for your plant to stretch out and grow. Fill in the extra space with an equal mixture of potting soil and compost.
Yellowing leaves may mean a plant needs more nitrogen. Liquid fish emulsion can quickly boost plant growth. It’s simple to add, since you don’t need to mix it into the soil. Dilute the concentrate with water, following the instructions on the label, and slowly pour the mixture into the pot. Be aware that fish emulsion smells pretty, well, fishy, which can be a problem for indoor plants. Cut down on the stink by adding a few drops of lavender oil before pouring.
Written by Acadia Tucker, a regenerative farmer, climate activist, and author.
Back to beginner gardener resources.
Register your Climate Victory Garden.
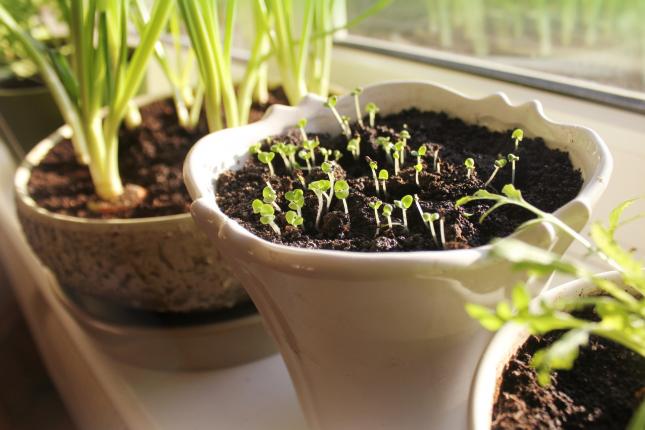
If you don’t have access to outdoor space, you can still grow good food indoors. You can find creative solutions for growing just about anything indoors, but some plants especially thrive indoors. Follow the guidelines on growing food in containers, with these additional considerations for growing indoors:
Choose a location that’s easy to access, but also out of the way enough that the containers aren’t in the way or easily knocked over. Windowsills and large countertops are great options, especially if they get at least four to six hours of direct sunlight each day.
If natural sunshine is in short supply, consider purchasing a small indoor grow light. Many local garden stores and online vendors have starter options as inexpensive as $20. With a grow light, you open up a lot of possibilities for location. Because plants also like warmth, which they would naturally get from the sun, some folks keep their plants on top of the fridge (which gives off a bit of warmth and warm air rises). Keep plants away from air conditioning units and strong fans and choose a location with generally consistent temperature and humidity.
Microgreens are packed full of nutrients, only take around 10 days to grow, and take up a tiny amount of space. Choose from fast growing radish greens, spicy water cress, or substantial sunflower greens.
Each plant will have different growing requirements (check your seed packet), but many require seed soaking before planting in soil. You can grow them densely in repurposed fast food containers, yogurt cups, or any other vessel that you can add drainage holes to (or there’s lots of trendy kits online). Keep a pair of scissors handy to trim microgreens onto a salad, sandwich, smoothie, or just about any meal.
Baby greens are essentially micro greens that have been given more time (around 2 weeks) and space (space around an inch apart).
Sprouts are younger than microgreens—they’re seeds in early germination and growth. This means they’re ready to eat even faster, as soon as three days after you start them.
Choose a sprouting seed like alfalfa (to make the classic sprouts you see at the grocery store), broccoli, chia, or pumpkin. You can even sprout many raw nuts and beans. Be sure to buy seeds that are meant for eating instead of planting, as they’re treated and processed differently.
You’ll need a large mason jar, repurposed pickle jar, or other clear glass container with a lid. Many seeds are very small, so you need a special lid for draining water from the sprouts. You can purchase a sprouting lid for a few dollars at many health food stores or online, or you can repurpose a piece of screen or mesh secured to the jar with a rubber band.
Soak 1-2 tablespoons of seeds in the jar overnight. After soaking, drain, rinse, and store upside down so excess water can drain out. Rinse at least twice a day until your seeds sprout and store in the fridge in a container lined with paper towel or filled with cold water (change the water regularly).
Fresh herbs are expensive to buy at the store but are relatively cheap and easy to grow indoors year-round. They prefer 6-8 hours of direct sunlight each day, otherwise may need a grow light.
The herbs that grow best indoors are perennials like mint, oregano, thyme, and rosemary. Parsley, basil, and cilantro can also be grown indoors but need to be replanted regularly. Trim off the plant with scissors as needed for adding to meals—this trimming actually encourages the plant to grow more, just like a haircut—but avoid removing more than a quarter of the leaves at any one time.
Foods from the grocery store that still have the root node can be placed in a jar or bowl of shallow water and grown at home. When you’re shopping, choose produce with this root node still intact, like a full head of lettuce instead of loose-leaf lettuce. Other foods you can grow this way include celery, beet greens, bok choy, and green onions.
Mushroom stems, onion ends, and sprouted potatoes can also be used to grow food at home.
Growing at home helps you eliminate food miles and the climate impacts of shipping food around the world. Growing from kitchen scraps takes that one step farther by keeping these organic materials out of the landfill where they produce methane, a powerful greenhouse gas.
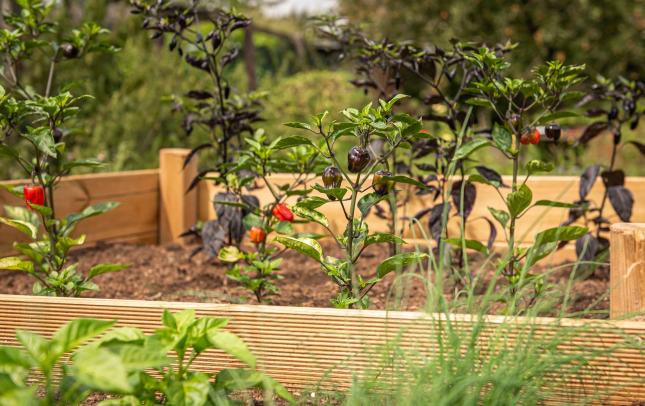
Raised beds are essentially extra-large planters, generally made of wood, brick, or stone.
It may be tough to disassociate gardens with raised garden beds, as this is such a common element in today’s home gardens. But, take a minute to consider whether you really need raised beds. They can be costly to build and are resources intensive, which has impacts on the planet. For many, planting directly in the ground is the easiest and cheapest option.
However, they’re a great option if you’re unsure of the health of your existing soil (as is the case in many urban areas). Because the beds are raised up from the ground, they also help prevent back strain, since you won’t have to bend down far to tend your plants. Their height may discourage some garden pests, and they have excellent drainage by design, making it tough to overwater them (but also tough to keep moist if you live in a dry area).
Although you can purchase ready-made raised beds, making your own can save money—and help ensure that all of the materials are as good for the planet as your garden. There are a number of things to consider when building raised beds such as depth, width, and materials.
Length and width are important elements of designing any garden bed (raised or not), which are covered here.
Depth is a new variable if you’re planting in raised beds. No matter what you’re growing, beds should be an absolute minimum of six to twelve inches deep. This minimum is most appropriate for plants with small root systems like lettuce and other greens. If you want to grow root vegetables, like carrots or beets, consider the final size of these vegetables and ensure your bed is at least this deep, plus a few inches extra. For larger plants—like tomatoes—and more substantially rooted perennial plants, consider providing the same amount of root space as the plant takes up above ground.
Avoid pressure treated woods. There are a number of chemicals and fungicides used in pressure treated wood—these types of wood are actually prohibited under the organic certification, which means you probably don’t want to use it for the food you are growing at home either!
Some woods are naturally rot-resistant, which make them the most natural option for building a garden bed frame. Cedar, black locust, and redwood are examples of this, with lifespans up to 15 years once exposed to the elements in your garden. Do your research on the wood’s source and choose sustainable options when possible.
There are many recipes for creating natural wood sealants using beeswax, jojoba oil, linseed oil, and others. Here are some examples. You might also consider other long-lasting materials, like pavers.
You’ll also need to fill the beds with soil. Contact your local garden stores and even local farm and compost operations to find the option that fits your budget and your goals of being part of the climate solution. Soil is often the most expensive material in creating raised beds. Choose organic and local options where possible. If you can’t find local soils, consider mixing whatever option you do have with locally made compost, in a ratio of 1:1. The local compost has rich microorganisms adapted to your area that will thrive to support healthy crop growth and carbon capture in your soil.
Potting soil can also work well for elevated raised beds.
Every garden bed will be uniquely suited to each gardener’s needs. Those with back issues, will want taller beds. Those worried about gophers will fasten chicken wire to the bottom before adding soil. Some beds will be built right on top of existing soil to extend the root area and welcome native soil microbes into the bed, while others will place beds on impermeable surfaces or need to create barriers to ensure roots don’t come in contact with toxic soils underneath. Still others will incorporate crop covers or insulation for pests and challenging climates. YouTube is full of amazing tutorials for all needs.
Tips for raised beds, pest control, soil health, and more from Permaculture expert Nicky Schauder - www.greenamerica.org/climate-victory-garden-questions-answered
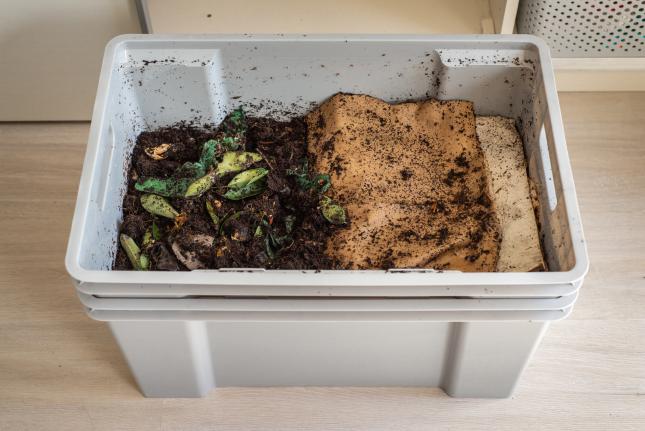
Composting is something that everyone can do, even if you live in an apartment. Every compost arrangement will look different based on where you live and how much waste you have to process, but all can be good for the planet (and your garden).
Composting is all about assisting in the natural decomposition of your kitchen and yard scraps to create a rich garden fertilizer. It’s good for the planet and your garden. Food and yard waste take up a quarter of municipal landfills, where they release the harmful and very strong greenhouse gas methane.
Instead, these organic materials can be turned into compost to feed soil microorganisms that boost our crop health and sequester carbon. Using compost as a fertilizer also offsets the climate impacts associated with the production and transportation of store-bought fertilizers.
If you live in an urban area or lack outdoor space, vermicomposting (worm composting) might be the best solution, because it can be done in a small space and even indoors in five- or ten-gallon buckets. Compost can be put on indoor plants or shared with anyone who has a yard.
If you have more outside space, multi-tiered composters and tumbling barrel composters are good low-maintenance options that are pest resistant, but they can be costly.
Piles and holding bins are also good options for those with outdoor space. An open compost pile is free, but takes a lot of strength to turn regularly by hand, requires a lot of organic material, and is the slowest to decompose. A holding bin can be made out of repurposed materials, making it an affordable option that’s more contained if you think your neighbors wouldn’t appreciate an open pile.
If you want to redirect your organic wastes but don’t want to compost yourself, chances are there’s a local or even municipal compost service that will take your food and kitchen scraps. This is often fee based. Consider reaching out to local farms and gardens to see if they want this material for their own composts.
It’s easy to feel overwhelmed by all the information out there about composting. Composting is like your gardening journey: start simple and adopt more advanced techniques as you feel ready.
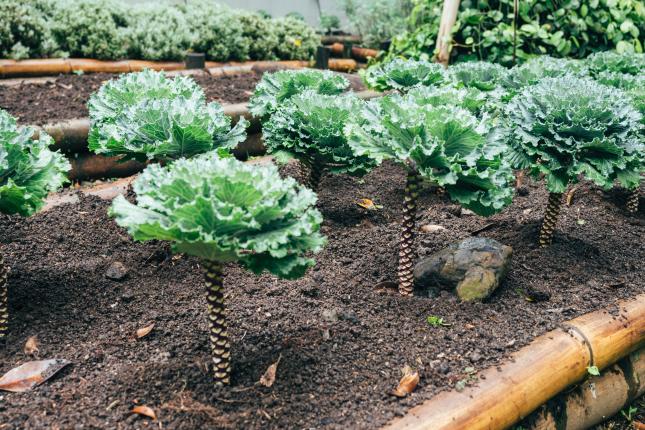
Plants fall into two categories: annuals and perennials. Many of the most common garden plants are annuals, meaning they have to be replanted every year or season. They have short life cycles and mature and die (or are harvested for you to eat) within the course of a single season. Annuals include crops like peas, corn, basil, and carrots. There’s too many to list here, but the back of your seed packet will tell you whether your plant is an annual or perennial.
Perennials are plants that grow and provide harvests for multiple growing seasons. You plant them once, and depending on the crop, they can live for two years up to decades. Perennials that are commonly planted in and around gardens include berry bushes, rhubarb, rosemary, asparagus, and fruit/nut trees. Depending on where you live, some perennials—like kale—are grown as an annual crop because it’s not able to survive the winter.
While perennials can be more expensive upfront, they can save you money over the years because you don’t have to buy new seeds or seedlings each year. They also require quite a bit of attention the first year, but are quite sturdy and self-sufficient after that.
Perennials play an important role in the soil health of your Climate Victory Garden. Because they don’t need to be replanted each year, soil disturbance is minimized and soil organisms thrive. These healthy soils hold carbon and grow vigorous crops. The plants themselves take carbon out of the atmosphere and store it in their trunks, stems, and leaves—as well as in their deep root systems that ultimately feed the soil microbiome. Perennials have extensive root systems, with the added benefit of storing carbon deeper in the soil where it is more stable. When above-ground parts of a perennial plant are harvested, the plant sheds its deep roots (and the carbon they’re made up of) but retain enough to grow back the following season.
Beyond carbon sequestration and climate benefits, perennial plants can help increase the water holding capacity and reduce the erosion of soils; reduce time, labor, inputs; and improve habitats for invertebrates and small mammals.
Diversity above ground encourages diversity in the soil. Growing a variety of crops—a combination of annual and perennial plants—supports healthy, carbon-sequestering soils because it encourages diverse soil communities and distributes carbon at varying depths underground. Diverse gardens are better able to resist weather extremes and are more resilient in the face of droughts, floods, and other impacts of the climate crisis. They have greater ability to withstand some pests, which reduces the need for pesticides. And, having a variety of crops also improves the diversity of diets and food security for consumers and local communities.
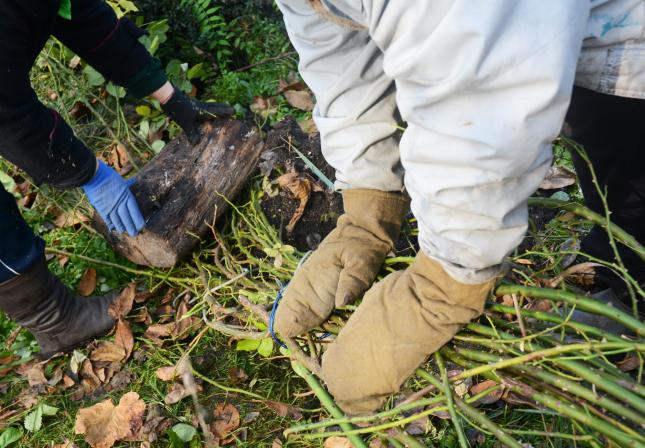
For optimum success in your garden come spring, we recommend using the fall to tidy up, do a bit of strategic planting, and protect your more delicate and tender plants from the coming frost and snow.
Preparing your garden for winter can seem like a daunting task, and it can be hard to know where to start. That’s why we’ve put together this comprehensive list to make sure you don’t miss a trick and to ensure that your garden is as healthy as it can be all year round.
We know it can be tempting to clear everything from the garden before winter. We’ve long been taught to value this neatness, but we invite you to embrace a lower maintenance method that’s also better for the environment.
Old corn stalks? Flowers past their prime? Leave these roots in the ground to cover and protect soils from erosion and low winter temperatures.
If you don’t like how it looks, you can push plant material flat on the ground so it’s less visible but still provides the nooks and crannies for beneficial insects to wait out the cold season. If you still can’t stand the look of this, you can trim plants down to within a few inches of the soil, still leaving the roots intact. We encourage you to see the dry plant stems as a way to add a little winter beauty to your garden, especially on frosty and snowy mornings where they can showcase their dramatic shapes.
You can also use dead leaves to cover the soil around plants as mulch, which insulates the roots, provides foraging habitat for birds, and serves a safe space for other small wildlife and pollinators. Learn more about the benefits and methods of composting leaves from our friends at Greenability.
If you’ve allowed plants to go to seed or fruit to stay on the plant, consider saving these seeds. You can preserve excess harvest by freezing, drying, or canning. Or, share with friends.
Think back to how much time you dedicated to your lawn this year—how much maintenance it required. There are many less time-intensive alternatives to the lawn that are better for you and your family, local ecosystems, and global environmental health. Fall is a good time to replace that turf grass with a carbon-capturing, biodiverse meadow; extend your Climate Victory Garden; or try out a low-maintenance landscaping style like xeriscaping.
Some plants benefit from being protected from the cold in a dry, sheltered area. If you’re growing in containers, this is easy! Bring any tender potted plants into your home or greenhouse.
If you have sensitive plants in the ground, do some research on best ways to overwinter. Preparing your garden for winter includes insulating them where they are, trimming and repotting to bring indoors, and taking cuttings to plant in the spring.
Perennial plants are those that survive for many seasons and don’t need to be replanted annually. They’re an important part of Climate Victory Gardening, because of their ability to capture carbon and protect soils.
For perennials that bloom and produce in late spring/early summer, fall is the best time to plant. Get started before the coldest weather to give them a good opportunity to get established.
Fall is a great time to start composting because of the abundant compost material available this time of year, especially leaves. Pile your leaves—and your neighbors if they have extra—with alternating layers of soil and/or coffee grounds. (Not a coffee drinker? Tea leaves work too!) Water thoroughly and protect the pile from blowing away. By spring, materials will break down into nutrient rich compost.
Already a composter? Move your compost to a sunny area and insulate it with layers of straw, cardboard, or similar organic material. Even if the cold temperatures stop decomposition, continue adding food scraps and other materials, which will continue to break down from freeze-thaw cycles.
Add compost to soil that grew plants during the past season, especially where you planted heavy feeders like tomatoes.
Sheet mulching with newspaper or cardboard can provide important weed control and add much needed organic matter to depleted soils.
You might have created a garden sketch or something similar to plan your garden in the spring. Did you stick to that plan? If not, we recommend updating it, as this will help you to rotate your crops the following year.
Clean, repair and replace tools. Patch up fences, sheds, pathways, and greenhouses. All this is much easier to do in the cooler weather of fall, and you will be grateful for it when it’s time to get busy in the garden again.
Even in the off-peak gardening season, there’s still lots of planning to do.
Want to expand your garden or try out some new plants next year? You have all fall and winter to research new varieties, and many gardeners find great joy in seed catalogs.
Making lists and diagrams is a great way to keep you excited about the next season while also helping you plan better. Review your garden sketches, notes, and journals to determine what plants and/or methods didn’t work, and plan accordingly for next year. Create long-term goals for your soil and re-evaluate goals for the season passed. Consider what carbon-sequestering methods you used and how to improve upon these and try new Climate Victory Gardening practices next year.
Spring always seems to come around quicker than expected. Fall and winter give you plenty of time to hone-in on what you want to do with your garden next year. So, don’t go into hibernation, take advantage of this time and prepare your garden for winter!
By Chris Lee, a freelance writer, with writing published about cycling, green living, and ways to make a difference without fundamentally restructuring your lifestyle. Prepared in partnership with Upgardener.

Don’t be afraid to ask neighbors or local gardening experts for help if you are struggling with your garden. Check out the Climate Victory Gardening map to see if there are other climate-focused gardeners in your area and let us know if you’d like to connect.
Join our Climate Victory Gardeners Facebook group so that you can connect with a community of gardeners who care about the climate. In this group, you can ask questions, share resources, and stay up to dates with gardens across the country.
Back to Climate Victory Gardens home.
Have a question that’s not answered here? Or, have advice you’d like to share? Let us know: ClimateVictoryGardens@GreenAmerica.org.
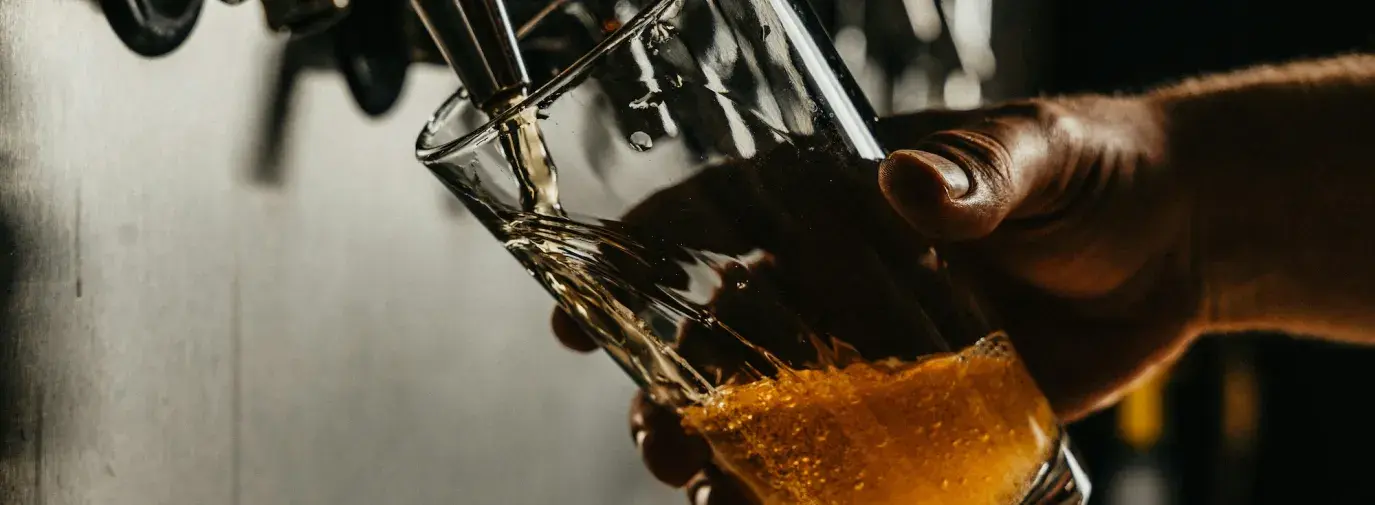
Major beer companies, including Anheuser-Busch, are using harmful pesticides like glyphosate and 2,4-D in their barley and hops. These chemicals threaten human health, devastate pollinator populations, and contaminate our water systems.
We’re calling on The Children’s Place, Carter’s, and H&M to take the next step in sustainability by committing to reduce their use of polyester.
A resource for beginners: Take charge of your finances in four areas - banking, credit cards, property insurance, and investing.
Green America is pushing Artificial Intelligence (AI) companies to use renewable energy so communities aren’t polluted and climate change isn’t made worse by fossil fuels they plan to use.
While Fall is a time to harvest the final veggies in our gardens and put them to bed, it is also an active planting season! Many plants need a dormant period before being able to produce their flowers or fruit. …
Worm composting is a great way to make use of your kitchen scraps and make your own free, nutrient-rich fertilizer for your garden. Better yet, composting reduces your climate footprint by diverting organic waste from the landfill, where it rots…
Eco-friendly lawns are patches of green space that have the potential to promote clean air, carbon sequestration, and serve as pollinator havens, but only when we abstain from unsustainable products and practices. As you nurture your backyard,…