Green America sat down with Debby Ward to discuss best practices for building a dream vegetable garden from scratch. Debby is the Founder & Owner of Prior Unity Garden, which has been helping people make their organic garden dreams come true through online and in-person courses since 2009.
There is something rewarding and comforting about growing vegetables, but many people feel unsure on how to start, confused about all the information out there, frustrated with their own lack of focus, overwhelmed by the commitment, concerned they are not on track, or simply not sure how to do it.
I was one of the lucky ones, crawling around my parents’ garden and learning lessons at a young age. In my passion to help folks grow organic food, I’ve drawn on my over 40 years of experience. I have tested these steps in real-time, teaching others, and learning what works. From this, I have honed starting a vegetable garden to five basic steps:
Step 1: Solidify Your Garden Goals
Each of us has our own vegetable garden dream or vision, and this is where to start your garden journey.
- Take time to draw or write about your dream garden. Consider your garden goals: growing great tomatoes to save money on groceries, getting your kids outside to grow food, or creating a habitat for pollinators.
- Make a list of what you want to grow based on what you like to eat. Start simple, with the “must-haves,” just like you would if you were trying to find a new car or place to live.
Step 2: Observe & Assess Your Property
Observation is an important step before breaking ground and will ensure greater success down the line. Spend some time observing the sun path on your property; look for sun and shade during different times of day as the light changes, keeping in mind that many plants need at least six hours direct sun each day. Go out after a heavy rain and see where the water goes, considering many veggies are thirsty and can suffer without good drainage. Observe critters, including those that want to eat your garden, like deer, and garden helpers, like bees.
It’s also important to assess your time and availability during this step. A realistic assessment of your time points you to the best size garden for you. A container garden is best for those with just a few minutes. For those with two to three hours a week, a small raised bed might be the option. Watch out though, gardening is a happy addiction!
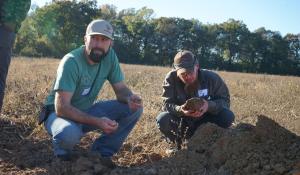
Step 3: Build Healthy Living Soil
Poor soil is the number one reason I see gardens fail. Soil is the foundation of your garden. It’s not just the medium that holds your crops in place, it feeds the veggies that ultimately nourish you.
For a raised bed or in-ground garden, don’t just dump organic compost on the ground. Use a garden fork to loosen this subsoil, then add the soil builders in layers—first a couple inches of organic compost, then a layer of newspaper or cardboard, then four to six inches of organic compost, and then mulch. This approach builds soil over time, as the materials decompose to feed and protect the underground microorganisms that make soil healthy.
Wondering about the health of your soil? Read more here.
Step 4: Choose Plants & Seeds
There are pros and cons to consider when choosing between seeds and transplants for your garden. Transplants can be quicker because they’re already several weeks old by the time you plant them, but they are also more expensive. Starting from seed saves you money and offers more diversity. Some crops—like root vegetables and plants that germinate quickly—must be grown from seed because of their delicate roots that will not tolerate transplanting (seed packets have this information).
For both seeds and transplants, source is incredibly important. Choose companies that are committed to non-GMO, chemical-free, organic, sustainable, and/or responsible growing.
In fact, sourcing is so important that I review many seed companies on my site. You can also find good seed brands from Green Business Network members like the Turtle Creek Biodynamic Seed Initiative and others at GreenPages.org.
Step 5: Plan Your Garden Layout & Planting
You don’t have to be an artist to draw a simple layout of your garden. Consider these points when deciding where to put plants in your garden layout:
- If you’re short on space, consider growing “up” with plants that climb trellises and have a small garden footprint to allow you to grow more in the same square footage.
- How much space, sun, or shade does each variety need to thrive? Seed catalogs and packets will have this information.
- Companion planting can be a boon for your garden, because choosing combinations of plants that support one another can reduce work for you as a gardener. For example, nasturtiums, marigolds, and fragrant herbs can repel pests from tomatoes and cucumbers. Corn makes a great trellis for climbing plants, and thick crops like peas and beans can shade out weeds while adding important nitrogen to the soil.
Then, plant! And, enjoy the experiment. Make note of what did and didn’t work for next season.
There are lots of great gardening resources out there to help you on your journey, like Debby’s online classes at PriorUnityGarden.com and Green America’s Climate Victory Gardens Toolkit at: greenamerica.org/CVGtoolkit.
Whether you had childhood dreams of being a farmer, are sick of the produce section, or simply want to challenge yourself, get started with your vegetable garden today!