
Climate Victory Gardening for Seasoned Gardeners
Whether you've been gardening for decades or are just beyond the basics, we'll help you garden for you and the climate.

Whether you've been gardening for decades or are just beyond the basics, we'll help you garden for you and the climate.
Because you understand the fundamentals of growing food, pollinator habitats, and healthy soils, you can take it to the next level to ensure your garden is part of the climate solution.
It's easy. If you have a garden, you're likely already using some of the Climate Victory Garden practices.
Our #1 tip for more seasoned gardeners is to think critically about the ways you can protect your soil and make decisions that reduce emissions beyond the boundary of your garden. These two approaches to Climate Victory Gardening help your garden soil store carbon and encourage best practices for the climate. These resources will help you do both.
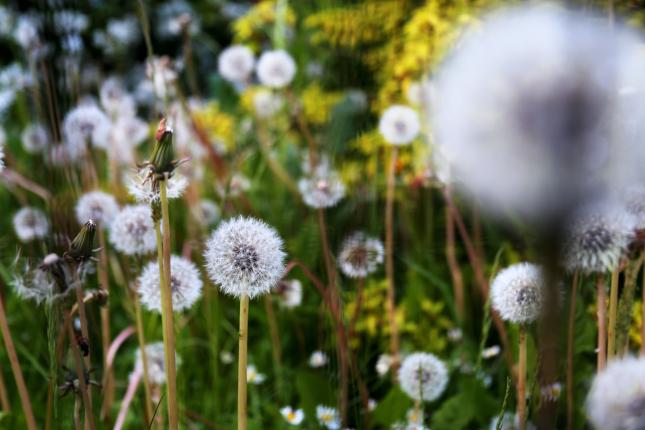
You may hate weeding, but there are reasons to like weeds—or at least respect them.
Weeds are good for your soil, and there's a lot we can learn from weeds. They're resilient enough to grow pretty much everywhere, no matter how poor or barren the earth. They cover and give soil life, much like a living mulch, which is a boon for the climate. And seasonal cycles of weeds growing and dying build up nutrients in the soil and make way for larger plants, like shrubs and trees. Without weeds, the natural landscape we love would be very different.
Weeds also tell you a lot about your soil. Before pulling weeds, try reading what they have to say about your planting area. Weeds can signal whether you have soil that’s low in nutrients, high in acid, or even waterlogged. We highly recommend buying a field guide to weeds growing in your region so you can learn from them.
Weeds that signal soggy soil: dock, horsetails, chickweed, sedge, and willows
What to do about it: Wet and soggy soils are hard to drain and frankly not worth messing with. Besides, given that wetlands are disappearing at an alarming rate, it’s probably better for the planet if you just let it be.
Weeds that signal compacted soil: chicory, knotweed, dandelion, and bindweed
What to do about it: Packed soil limits the ability of plants to extend their roots and absorb vital nutrients for growth. A good way to break up the soil is to plant it with a cover crop like clover or vetch in the fall. The roots can punch through the soil, loosening it in time for the next season’s crop. Another option is to use a broadfork, which is a large heavy four-pronged steel fork that loosens the soil without having to till it.
Weeds that signal acidic soil: plantain, sorrel, and stinging nettle
What to do about it: Soil that is acidic has a very low pH and, unless you are growing blueberries, your plants will struggle to survive. You can change your soil pH by adding lime, follow instructions from the supplier. The lower your pH, the more lime you will need.
If you don’t want to add lime, you can plant blueberries, rhubarb, endive, shallots, potatoes, or watermelon in that area because they can tolerate soils as low as 5.0 pH.
Weeds that signal basic soil: Queen Anne’s lace, chicory, peppergrass, and chickweed
What to do about it: Basic soil is alkaline, which is another way of saying it has a very high pH. A high pH is usually a result of calcium-rich bedrock. Treating basic soils with elemental sulfur quickly lowers the pH, but we prefer adding lots of compost instead because it yields a bigger return. Compost acts to buffer the soil and prevent sudden changes in pH. The complex molecular structure of compost provides a great deal of hydrogen atoms, lowering pH and enhancing soil’s ability to hold onto nutrients; not to mention the carbon benefits of composting.
Another option is to plant your basic soil with asparagus or members of the cucumber family, which do just fine in a high pH environment.
Weeds that signal fertile soil: foxtail, chicory, purslane, and lambsquarters
What to do about it: Every gardener dreams about having fertile soil, but the downside is that weeds love it too. This means you have to be highly vigilant about removing weeds as soon they crop up and before they start to seed, or they’ll wreak havoc on the rest of your plants.
Weeds that signal dry and sandy soil: sorrel, thistle, yarrow, and nettle
What to do about it: Sandy soil is not a terrible thing. In fact, many vegetables love the loose, well-drained stuff. Best way to deal with this is to grow plants that love living in it, which include carrots, beets, onion, and garlic. Toss in some extra compost for a nutrient-boost.
Weeds that signal heavy clay soil: plantain, nettle, and quack grass
What to do about it: Most plants have a difficult time thriving in heavy clay because the dense soil makes it difficult for healthy roots to develop. But some plants do just fine in this dense environment, including shallow-rooted annuals, like lettuce, chard, and beans, which appreciate the moisture. Deep-rooted top-heavy crops, like broccoli and cabbage, also benefit from the stability offered by clay.
Article originally published on Stone Pier Press, written by Acadia Tucker, a regenerative farmer, climate activist, and author.
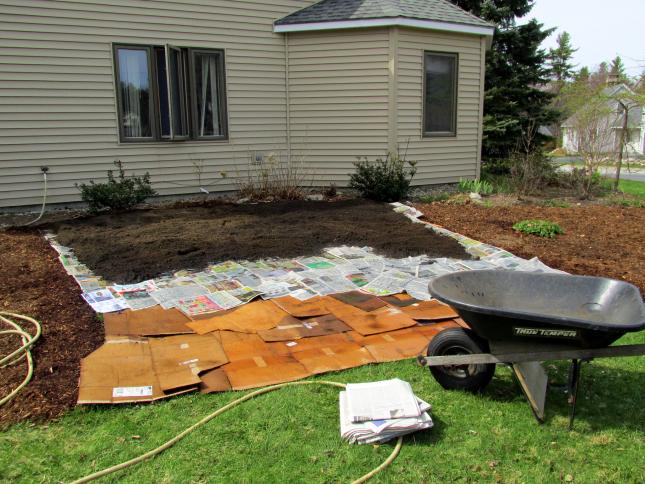
The key to a successful Climate Victory Garden is preparing your soil. This is where crops gather nutrients to grow your food and where carbon is sequestered as part of the climate solution. Whether you’re updating a current garden, replacing your lawn, or just covering a weedy area, your garden soil needs to be prepared and enhanced for planting.
Don’t let anyone tell you that you need to buy expensive bags of soil from the store. The easiest and most inexpensive methods for preparing the ground are to broadfork and sheet-mulch your garden area.
Note: these processes are best done in the fall, but it can take an entire season to gather supplies, so do your research and plan ahead!
The broadfork, also called a U-fork or grelinette, is a tool for manually breaking up densely-packed garden soil like hardpan to improve aeration and drainage. An important part of Climate Victory Gardening is protecting soils and limiting the amount you disturb them. This allows the microorganisms in the garden soil to better hold onto carbon. But, some soils need to be loosened up to create space for roots and more abundant life that make for a healthy garden. A broadfork helps you do this with the least possible disturbance.

Before using the broadfork, consider testing your soil to see what it may be lacking, and add nutrients as recommended while loosening the soil.
To use a broadfork, plunge the tines into the earth, jump on the horizontal bar, and rock back and forth to loosen the soil. Then move forward a couple feet to repeat the process until all the garden soil is aerated. This is preferable to tilling and completely turning the earth over because it’s less disruptive to life in the soil.
That said, this is a substantial tool and one you likely won’t need often. Your best bet is to find one at a local tool share program or contact local garden groups to see if you can borrow one.
Once you’ve aerated the entire area, you're ready to plant. Or, build up your soil health even more with sheet-mulching or lasagna gardening methods.
Lasagna gardening, also known as sheet-mulching, is best for when your garden soil isn’t terribly hard or compacted (if it is, consider using a broadfork first). It’s a free way to build rich, healthy soils and is a good option if you have an abundance of weeds or are unable to physically turn your soil with a broadfork.
This method gets its name from the delicious layers or sheets of organic matter that you’re creating to feed the organisms in your garden soil. As these layers decompose, they feed soil life and make nutrients more accessible for the plant you grow.
These layers can be applied directly on top of grass or weeds (except particularly resistant and invasive weeds like crabgrass, which need to be removed by hand). Cover the area with cardboard and/or 3 to 5 layers of newspaper and wet it down to keep it from blowing away. The next layer can be any organic material that you would use in a compost pile. Alternate layers of green materials, like grass clippings and raw vegetable peels, with brown materials like dried leaves, straw, or shredded newspaper. Think of green layers as more wet ingredients and browns as drier. Continue to alternate the green and brown layers until your garden bed is 18 to 24 inches high. Finish with a layer of mulch and thoroughly water the area.
If you want to plant immediately after layering your lasagna garden, consider using more soil-like ingredients in your layers than paper and cardboard. Otherwise, it’s best to plant when the layers have started to decompose or to cut out areas to plant. Because of that, these garden soil preparations might be best done at the end of a growing season. Preparing your land in the fall gives these materials a chance to age and decay into garden soil over the winter.
That said, it could take an entire season to collect enough materials for lasagna gardening, so start gathering today! You can save newspapers and cardboard, but avoid glossy paper, tape, and staples. If you don’t have these materials at home, recycling bins can be good sources. Toss food and yard wastes in your compost pile (or keep in the freezer), noting that you can use these materials to layer even if they’re not fully decomposed. In the fall, collect dry leaves.
Pro tip: No time to collect this diverse list of materials? Use the late summer and fall to build a circular 16-gauge wire fence enclosure and alternate 6-10 inches of shredded leaves with a thin layer of soil or spent coffee grounds to promote decomposition. Water each layer and repeat until full. This makes for a great source of material for future plantings.
Both using a broadfork and sheet-mulching techniques helps soil retain carbon by adding organic material, making these methods powerful tools in the climate solution. If you’re using the Climate Victory Gardening practices that support soil health, you shouldn’t have to disturb your garden soil or repeat this process again. At the end of future growing seasons, remove dead or dying garden plants, spread compost or wood chips, and consider adding cover crops to increase fertility.
Written by Tom Van Dyke, a Master Gardener in the eastern panhandle of West Virginia, whose mission is to grow food sustainably. He has advanced degrees in food systems management and taught about food issues at the university level before retiring in 2013. (Top Photo Credit: mwms1916)
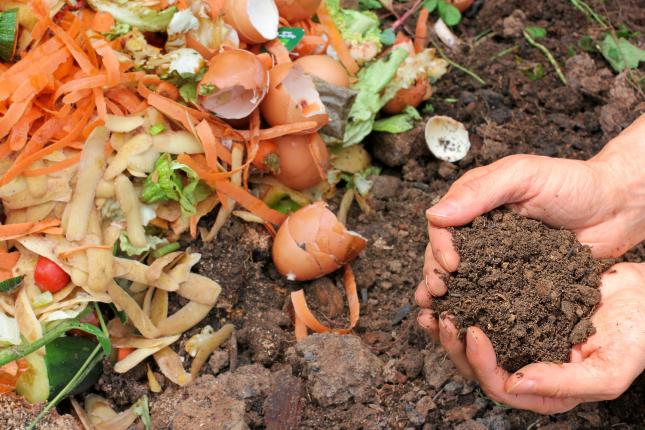
There's a thin line between fertilizing and over-fertilizing. Too few nutrients and your tomatoes and corn never really take off. Too many, and your artichoke and broccoli can suffer. We suggest using organic fertilizers to boost plant growth by feeding the soil. We also encourage you to test your soil every few years so you can know what nutrients your soil needs.
Organic fertilizers are most effective when used strategically rather than just dumped on a plant. You need to time it right, determine the optimal amount of nitrogen, phosphorus, and potassium, and bear in mind that perennials don't need as many nutrients as annuals.
Spring: Perennials benefit from a side dressing of nutrients in the spring just before new spring growth begins to push through the soil. In the early spring, add a nitrogen heavy fertilizer to really help your plants take off. You don’t need much or you’ll get leggy plants that flop over.
Mid-season: Sometimes plants need a little extra help when they start producing flowers and fruits. So much energy goes into ripening food that plants get stressed and weak plants emit distress signals that attract pests. Give your flowering perennials a boost in phosphorus to prevent stress and help fruits ripen faster.
Fall: Be careful not to add too many nutrients just before the winter rains set in or they’ll likely wash away. Excess nutrients drain into waterways, promoting harmful algal blooms that suck the oxygen out of water and kill aquatic life. If you do fertilize in the fall, ditch the nitrogen and phosphorus and focus on potassium-based fertilizers.
If you walk down the aisle of a gardening center, you'll likely be faced with a sea of numbers like 10-10-10 or 20-0-5. So, what do they mean?
The three numbers on fertilizer bags represent the concentration of minerals in the mix: nitrogen (N), phosphorus (P), and potassium (K). The higher the number, the higher the amount. A mixture of 20-0-5 has four times more nitrogen than potassium, for example, and no phosphorus to speak of. Keep the numbers straight by remembering the key phrase, “up, down, and all around.”
To use these organic fertilizers, simply mix them into the top three inches of your soil before planting and once more midway through the growing season. Do the same for established plants, except add a little to your plant base in the spring.
Any of the following can be used as a stand-alone soil conditioner. You can use two or three different types of organic fertilizers that have particularly high concentrations in nitrogen, phosphorus, or potassium throughout the season to address different concerns. If you'd like to keep it simple and rely on one all-purpose blend, go with homemade compost or purchase a pre-made organic mix from your local garden center.
Article originally published on Stone Pier Press, written by Acadia Tucker, a regenerative farmer, climate activist, and author.
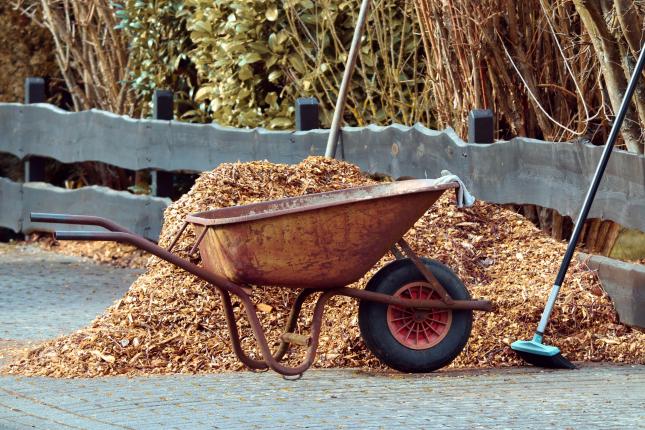
Mulch is any material, synthetic or organic, spread over the ground as a covering. Mulch can be leaves, wood chips, newspaper, pebbles, or even plastic and polyester fabrics—basically, anything that stays in place and protects the soil (more on the types of mulch). The protective layer it provides keeps the soil cool and moist in the summer and insulates tender perennials in the winter.
Mulch is a champion at smothering weeds, which saves time and energy for us hardworking gardeners. In the spring, spread two to four inches of mulch on garden beds to prevent new weeds from growing near vegetables and perennials. For really overgrown areas, use damp cardboard as a barrier and cover it with a generous layer of mulch, which is usually enough to knock out even the worst weeds.
Our favorite mulching superpower is its ability to support a healthy ecosystem under your feet, which benefits your crops and the planet. Natural mulches are high in carbon, which soil organisms like microbes and fungi need to survive. These organisms feed on the mulch, breaking it down, capturing carbon, and releasing essential nutrients that plants absorb as they grow.
Plants also pull carbon out of the air to form sugars used to fuel cellular activity. Any excess sugar is released through roots to support soil organisms in exchange for access to nutrients. The alliance between plants and soil organisms locks carbon underground as humus, the dark soil that every gardener lusts over, thus lowering the amount of carbon in the atmosphere.
Mulch can be applied anytime of the year, but you’ll see the greatest benefits if you do it in mid-spring or fall.
Mulching in the spring prevents weeds from growing, adds nutrients, and helps your soil retain moisture.
Garden expert Acadia Tucker’s go-to spring mulch is a 50/50 mix of shredded leaves and grass clippings because she always has a lot of yard waste. Shoveling leaves and grass onto your plant beds feeds the soil with nutrients well into the fall without having to turn over the compost pile. If you don’t have a steady supply of yard waste, consider asking your friends and family to save theirs.
Another option is to find some hay to use—old, slightly decomposed hay makes for a great spring mulch in the absence of yard waste. If all else fails, you can always buy mulch online or at your local home and garden store.
Laying down a protective layer of straw before winter can prevent the pounding rain and winds from washing away fertile topsoil. Straw has the added bonus of insulating plants from the freezing cold. Mulching in the fall is like tucking in your plants to keep them safe against winter rain, sleet, and snow.
In the fall, spread a layer of wood chips over your garden paths. Coarse materials like wood chips act as a cushion to protect the soil from being packed down by winter storms. You don’t want compacted, poorly aerated soil because it’s unable to absorb rainwater, hold nutrients, and support healthy microbial activity and root development.
Before spreading your first layer of mulch, take the time to thoroughly weed your garden beds. Mulch is effective at discouraging weed growth, but it can’t do much to kill weeds that are already well established. This task might seem daunting but think of it this way—after a few seasons of mulching, there won't be any more weeds to pull.
You can also lay down a black plastic tarp over the ground you want to clear, and secure it with stakes. The dark plastic warms the soil so intensely that it kills living weeds and weed seeds on the soil surface. This method also allows you to avoid disturbing the soil. Before you lay down the plastic, which you can buy from any online farm or garden store, rake compost into the first inch of soil. If you have plants growing in the bed, simply put the compost on top of the plants. If it’s the late fall, winter, or early spring you'll need to wait six to 10 weeks before removing the plastic. If it's warm outside, late spring through early fall, two to six weeks should be enough time to suffocate the weeds.
A third option is to use so-called lasagna gardening or mulching, where you layer cardboard, seaweed, leaves, grass, and repeat. We prefer this option because it not only kills weeds but builds soil.
Mix compost into the first few inches of your soil to add nutrients and encourage your plants to grow strong and healthy. Then soak the ground. After the first good soak, the soil stays damp longer, sharply reducing the amount of water you’ll need for the rest of the summer. In arid climates, mulching in the spring is the single best thing you can do for your plants.
Another good reason to soak your soil is because organic mulches absorb a lot of water and end up stealing it from plants if there’s not enough to go around.
Load a wheelbarrow or garden cart with your favorite mulch (learn how to choose your mulch here). Scoop mounds of it onto your garden bed every few feet. Use a rake to smooth out the piles. What you want is an even layer of mulch, two to four inches thick. Don’t overdo it! Spreading too much mulch makes it hard for rain to hydrate the soil.
You also don’t want to mulch too closely to the root crowns and stems of your plants, or you may produce rot. Aim for a distance of two inches. For larger perennials and trees, keep mulch at least eight inches from their base. In the spring, push mulch away from the base of perennials to prevent decay and give plants a head start into the new growing season.
One problem with mulch: It can attract pests. Rodents love its insulating powers and burrow into it to stay cozy during cold snaps. Mulch also hides slugs and snails that gnaw on vulnerable leaves in the coolness of night. If you have trouble with pests, avoid putting thick layers of mulch down in the fall.
Consider spreading a layer of coarse wood chips over garden paths each fall; the coarse material acts as a cushion to protect the soil from being packed down.
Article originally published on Stone Pier Press, written by Acadia Tucker, a regenerative farmer, climate activist, and author.
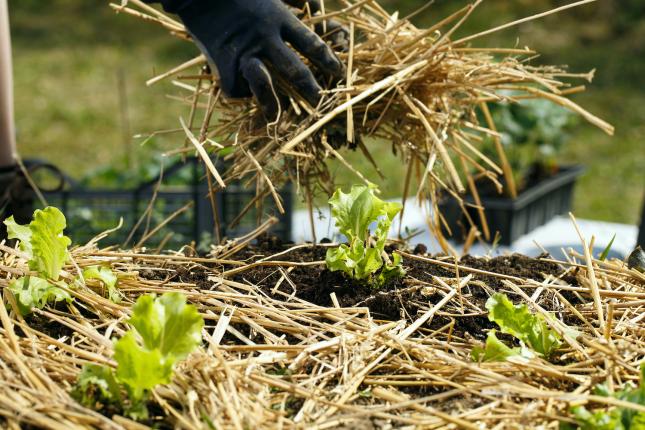
When choosing the right mulching material, consider what’s affordable, available, and appropriate for the task at hand. Are you mulching for weeds, warmth, aesthetic value, or water retention? Different mulches have different jobs throughout the garden.
Most mulches help your garden become a Climate Victory Garden because they protect life in the soil, encouraging the carbon capture that makes gardening part of the climate solution.
We encourage using organic mulches that persistently work to improve the health of the soil, that is, materials that are broken down by soil microbes to increase organic matter. Consider avoiding synthetic mulches like landscape fabric, because they do nothing for soil health and create more waste for the landfill.
Excerpt from article originally published on Stone Pier Press, written by Acadia Tucker, a regenerative farmer, climate activist, and author.
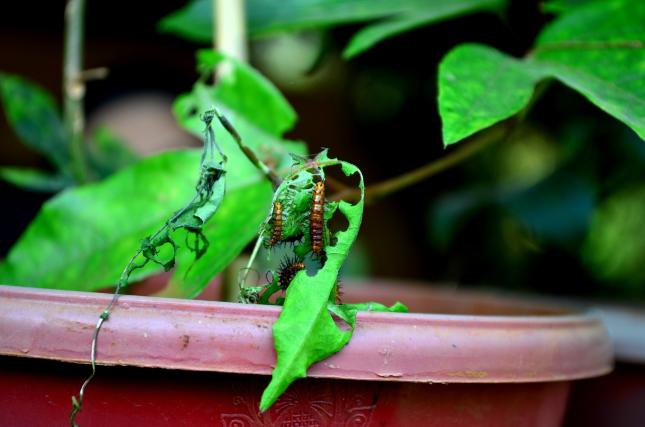
Pest populations can explode even if you keep your soil healthy and maintain a balanced garden ecosystem. Pest management is a natural part of growing plants and occasionally gardeners need to rely on external control measures like pesticides.
Organic gardeners shy away from using pesticides for some very good reasons. Sprays, particularly if they are not organic, can kill beneficial bugs and insects, like the bees that pollinate your raspberries or the insects that cycle nutrients through your soil. Pesticides also find their way into the food chain because plants absorb chemicals through roots and leaves.
Fortunately you can mitigate the risk of using pesticides by relying on ones certified for organic use, which tend to be derived from plants and naturally-occurring bacteria. Use these as a last resort, as they do have an impact on your local biodiversity as well as a climate footprint associated with their production and transportation to your home or local garden store.
Note: Certified organic or not, you want to keep pesticides in their original containers, out of reach of pets and children and in a dark and dry place that never drops below 40 degrees or gets hotter than 100 degrees. Be mindful of supporting pollinators.
Here are some pesticides that are certified for organic use:
Neem oil is a great preventive control measure. It comes from the bark and leaves of the Neem tree, a common evergreen grown in tropical and subtropical regions. Azadirachtin, the active ingredient in Neem oil, makes insects grow slowly and eat less. It also makes them lose interest in laying eggs so there are fewer of them to begin with. Neem is particularly effective against fast growing beetles, small caterpillars, and aphids.
Use Neem on plants as soon as you see the first adult bug, and spray weekly. Keep your bees safe by covering treated plants with a row cover. Don’t expect Neem to instantly rid your garden of pests. It works over time by limiting the reproduction and growth of bad bugs. If you want to speed up the process, you can also hand-pluck adult bugs from plants.
Preparation: Most Neem products come as a concentrate that needs to be mixed with warm water before spraying it onto your plants. Follow the label instructions to know the proportions to use. Apply the mixture weekly to the tops and underside of leaves. Avoid spraying in direct sun, since it will burn oil-covered leaves, much in the way baby oil causes skin to burn.
Storage: Concentrated Neem can be kept for up to two years.
Insecticidal soaps are an effective way to control soft-bodied insects if no beneficial bugs are around to do the job for you. The fatty acids in insecticidal soaps break down the protective cuticles of soft-bodied pests like aphids and caterpillars, which become dehydrated and die.
Soap sprays only kill insects that are sprayed directly so be sure to thoroughly wet both sides of leaves and avoid spraying beneficial insects, like bees and spiders. Repeat applications every five to seven days, as new pests hatch and form colonies. Keep a premixed spray bottles on hand so you can spray pests as soon as you see them.
Preparation: Make your own soap spray by mixing one tablespoon of dishwashing soap per quart of water. You can also buy an insecticidal soap concentrate. Follow label directions for diluting it because using too much can harm plant leaves. If you have hard water at home, use bottled water to make sprays, because the minerals in hard water reduce the effectiveness of insecticidal soap.
Mix only as much concentrate as you need for the day and keep spray bottles out of the sun, which will degrade the quality of your spray and make it less effective. Any unused sprays that haven't been used in a week can be diluted with more water and poured out in the garden far from any storm drains.
Storage: Soap concentrates can last for up to five years.
DE is made from the pulverized fossils of tiny sea creatures and looks like broken glass if you peer at it under a microscope. It kills insects by slicing up their protective outer layer and causes fatal dehydration when they walk through the dusty white powder. You can dust the leaves of your plants to kill leaf-eating bugs or create a barrier of white powder at the base of your plants to stop slugs.
DE is great for killing slugs, newly hatched Japanese beetles, and wireworms. It works best in dry conditions because rain makes the powder congeal in clumps and lose some of its sharp edges. If it rains, reapply once your plants have dried.
Storage: Make sure to store your DE in an airtight container to keep it dry. Properly stored DE can last indefinitely.
Bt is a naturally-occurring bacteria that ruptures the internal organs of leaf-eating insects like caterpillars. It only works on the bugs that eat treated leaves. It has no impact on pests that are directly sprayed so bees and other pollinators are left alone.
Direct sunlight degrades Bt after a few hours, so apply Bt late in the day when the sun is low. It will work to kill pests during their nightly feeding. You can use Bt every 10 days to control caterpillars and other leaf-eating insects until they're no longer a problem.
Store: Powdered Bt products can last for five years, while liquid Bt products last only about two years.
Spinosad is another naturally occurring bacteria, Saccharopolyspora spinosa, which produces a deadly neurotoxin that makes infected insects excited to the point of utter exhaustion. After eating it, insects immediately stop feeding and die within a few days. Spinosad works to control all types of caterpillars and some beetles that eat a lot of leaf tissue.
Apply spinosad to dry leaves as soon as you notice leaf-eating pests in the garden. Thoroughly wet both sides of leaves. Much like Bt, spinosad breaks down in direct sun, so late afternoon applications are the most effective.
Spinosad is somewhat absorbed by plant leaves so one treatment can last up to 10 days. Within the first 24 hours of spraying be careful not to let treated leaves come in contact with beneficial insects, like bees. You can protect your good bugs by draping treated plants in row covers, or fabric, for a day.
Storage: Spinosad products last about three years.
Plantskydd works against rabbits, voles, moose, chipmunks, squirrels, nutria, beaver, groundhogs, and deer. It can last up to six months, even over the winter season. According to company literature, it repels these pests by "emitting an odor that browsing animals associate with predator activity, stimulating a fear-based response that will have garden feeders looking for somewhere else to dine."
Article originally published on Stone Pier Press, written by Acadia Tucker, a regenerative farmer, climate activist, and author.
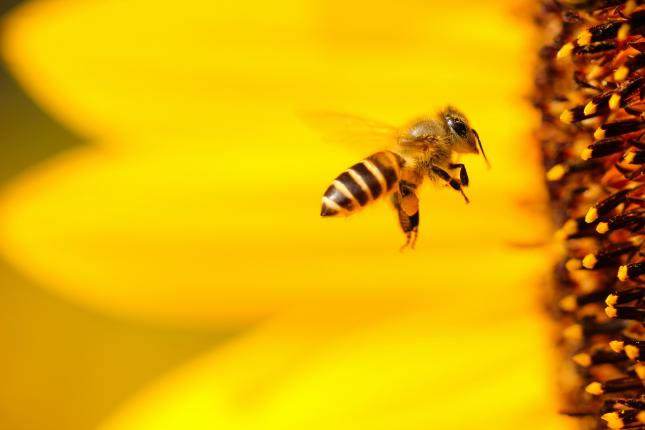
Pollinators are important allies in your Climate Victory Garden. These bees, butterflies, moths, flies, beetles, and wasps (and even birds and bats) pollinate between three quarters and 95 percent of all flowering plants on earth, including many of the crops and plants in your garden.
One in three bites of our food wouldn’t exist without pollinators, but these important players in our ecosystem are at risk due to habitat destruction, climate change, and the misuse of chemicals.
The best thing you can do to support pollinators is to reduce or eliminate use of synthetic chemicals in your garden, especially pesticides that are meant to kill pests but also inadvertently kill the beneficial pollinators. Be wary of chemicals that are advertised as non-toxic or low toxicity—for example, some formulations of permethrin are considered non-toxic to humans but are extremely harmful to bees. Fewer chemicals means fewer risks for pollinators (and you!) and contributes to the climate solution.
Creating habitat is also an important way to support pollinators.
Many pests can be easily controlled in a well-balanced garden. Using integrated pest management techniques like rotating crops, planting locally adapted pest resistant varieties, encouraging the natural predators of pests, and physically excluding and removing pests.
That said, if you find yourself needing to use chemical control, opt for organic options that protect your local ecosystem and pollinators, many of which are derived from plants or naturally-occurring bacteria. Be on the lookout for products that are greenwashed, and actually contain toxic ingredients—review the ingredients before using. Or, consider DIY remedies that are often comprised of nontoxic home ingredients, like soap, beer, garlic, and pepper.
Various pesticides work in different ways, so be sure to read the instructions carefully. If possible, apply in the evenings, when most pollinators are least active. Avoid spraying pollinators directly with whatever product you’re using, and cover plants after spraying for the duration of time that pollinators could potentially be harmed. Consider avoiding any pesticide use on all plants while they’re flowering.
Select plants that support pollinators. In some cases, these are plants you’d like to eat yourself like tomatoes or sunflowers. In other cases, they’re specific to the pollinators like milkweed for Monarch butterflies that add beauty and diversity to your garden.
Pollinator Partnership has a great tool where you enter your zip code and learn more about the specific plants that will grow in your area and what types of pollinators they will attract. For example, bees prefer bright white, yellow, or blue flowers with a mild odor and shallow shape. Butterflies, on the other hand, prefer bright reds and purples and flowers with a wide landing pad. Choose native and perennial options for greater climate impact, and plant strategically so there’s always something blooming.
Build a Monarch butterfly habitat. Plant a tree, where 30 percent of bees live and where most honeybees get their nectar. Buy honey from local beekeepers who care about pollinators and the environment. Build a hotel for mason bees (which are docile and don’t require much care).
You can also take action beyond your backyard. You can plant pollinator parkways in the spaces between your sidewalks and curbs. And, if your city is not yet a Bee City, you can encourage your city council to take part and get all residents on board with protecting pollinators.
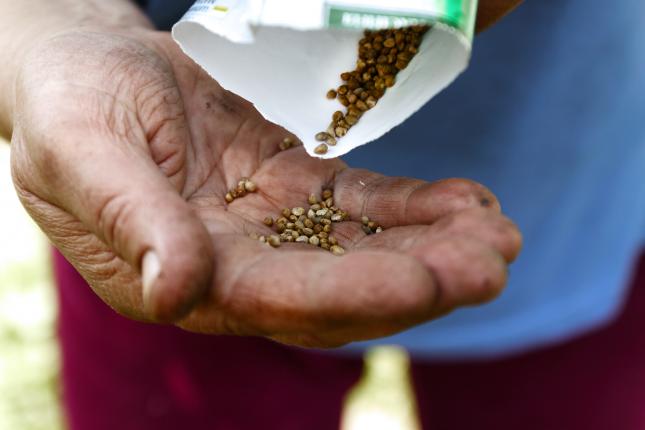
Even though it seems like we have many choices, most of the seeds in this country are owned by a handful of huge seed companies. These seeds are grown thousands of miles away from where they’re finally purchased. We don’t know the details of how they’re grown or their impact on the place they’re grown. It’s likely the seeds aren’t adapted to the area they’re ultimately planted, and the diversity of available varieties is low.
Seed saving is the solution, both to the seed industry’s impact on the climate (production and transportation, for example) and to our gardens’ ability to adapt to climate change.
When we save seeds, we've allowed plants to fully mature beyond the eating stage, into their reproductive stage when they set their seeds. Seeds are then selected from plants that have desired traits such as drought and disease resistance, flavor, size, or abundance. It only takes one generation for seeds to be imbedded with this ecological and cultural knowledge. As climate change creates unpredictable weather, our gardens and farms become more vulnerable. The health of our gardens depends on saved seeds that have generations of coding specific to our local and changing weather patterns.
Saving seeds is a powerful act, but it’s also simple to get started. Think of it as the final stage in a season of gardening, when we allow plants to grow to their mature stage and let seeds form. The following are easy, beginner-level vegetables for you to bring seed saving to your own Climate Victory Garden:
Always store your seeds in a cool, dark, dry space. Label with the name of the plant, date, location, and growing conditions. Consider adding any other pertinent information regarding the growing season that may be helpful to the future. And, if you have a special story that goes with those specific seeds you might want to include that as well.
Ready to take the next step in seed saving? Check out this Seed Saving Guide from the Organic Seed Alliance.
Written by Wendy Weiner, a gardener by trade, graduate of Seed School, and one of the founding members of the Salida Seed Library in Salida, Colorado.
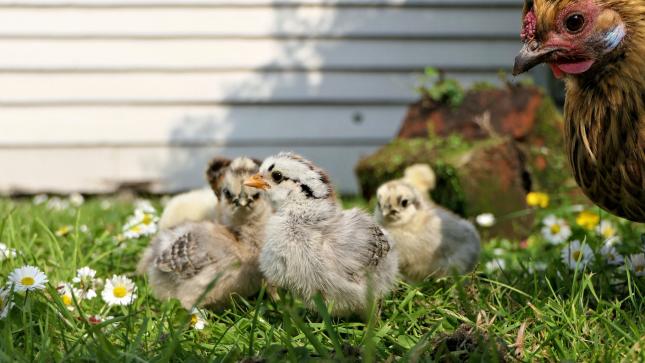
Check with your local officials to ensure that chickens are allowed where you live. Some municipalities have bans on chickens, or limits on how many chickens you can keep on your property. Because of their infamous early-morning cockadoodle-doos, roosters are banned from many cities. If your city isn’t yet chicken-friendly, CommunityChickens.com has articles on how to change local ordinances if you have one in your area.
You’ll need a chicken coop or a secure hen house that offers the birds a safe place to lay eggs, as well as a “run” where they can roam and peck. Make sure your coop is predator-proof.
Each chicken needs three to four square feet of space in the coop, and another three to four square feet in the run. Because chickens are social animals, we suggest a minimum of six chickens—which would require an 18-sq foot coop and a run of equal size. Experts also recommend having one nesting box inside the coop for every three to four chickens—you can use a pre-fabricated wooden box from a feed store, or utilize any number of things you may have at home, like old milk crates, plastic tubs, dresser drawers, and even a five-gallon bucket placed on its side.
If you’re a do-it-yourself-er, the internet is rife with ideas and instructions—from coops on wheels that can be moved from place-to-place in your yard to designs to build a coop for under $100. Choose non-toxic and sustainable materials to have the lightest impact on the earth and its climate.
Your local feed store and online companies like backyardchickens.com or The Front Yard Coop also carry ready-built chicken coops.
There are many breeds available for your flock. Different breeds have different personalities and different rates of egg-laying—and you can combine breeds in one flock for variety. Mother Earth News has a “Pickin’ Chicken” app to help you choose, or use MyPetChicken.com’s Breed Selector Tool to find the breed of chicken right for you.
If you want to raise your chickens from chicks, you’ll need heat and special feed; chicks can be found at local feed stores and farms. You may also be able to find older chickens locally. Consider looking at local shelters and farm sanctuaries first.
Taking proper care of your chickens will ensure that they stay healthy and will help you get the most eggs out of your flock. Each chicken requires about ¼ cup of feed per day, as well as a supply of fresh, clean water. Chickens can survive both hot and cold weather and will be fine outside with temperatures as low as 15 degrees, but their laying patterns will change with the seasons.
Be sure to be vigilant about cleaning your chicken coop every two weeks and cleaning your hands and shoes after handling chickens and their eggs. The old bedding material and manure collected from the coop and run make excellent organic fertilizer to add to compost and garden beds (once aged).
Keeping chickens is one of the optional Climate Victory Gardening practices because of the animals' climate-savvy fertilization techniques (manure) and their ability of divert organic wastes from the landfill where it would otherwise generate potent greenhouse gases.
Most hens start laying eggs at about six months old and will lay with the greatest frequency for that first year—around four to seven eggs each week, though it may vary with the seasons. The number of eggs she’ll produce will reduce by about ten percent each subsequent year, and most backyard hens can live from eight to ten years.
Learn more about The Many Benefits of Backyard Chickens.
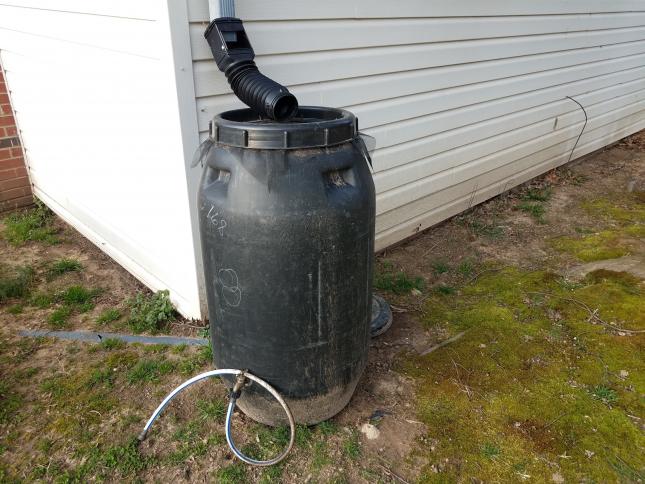
A rain barrel is a water catchment system that you can easily set up in your yard. All you need to do is find a large plastic barrel, install a screen over the top, and put a faucet at the bottom. Rain will run off your roof and into the barrel (placed strategically under a rain gutter downspout). The screen will catch debris, and you can attach a hose to the faucet and use the water as needed.
The most challenging part of installing your own water barrel will likely be finding the barrel itself. You’ll need a 50-gallon plastic barrel that is strong enough to handle the water pressure (a plastic trash can is typically too thin for the task and will collapse or break once it’s full). You can buy a barrel at most hardware stores, your local garden supply store, or a retailer from GreenPages.org, a directory of our certified Green Business Network members.
If you want to save resources, find a used barrel (hint: this is also the best option for the planet!). Check with local restaurants, bottling companies, or food manufacturers to see if they have used food-grade barrels. These businesses often receive large shipments of liquids in plastic barrels and have no use for them afterward. These barrels are engineered so the plastic does not break down when it comes into contact with liquid.
Once you have a barrel, these are the tools you’ll need:
Once you’ve gathered your tools, make a trip to your local hardware store to gather your supplies:
Now it’s time to put together your barrel. Follow these steps, provided by Clean Virginia Waterways. If you need some extra help, they have photos to accompany each step on their website:
If you have cold winters, store your rain barrel in the winter. Turn it on its side so it doesn’t collect water that will freeze and crack the barrel. Taking good care of your rain barrel will keep it in good condition for years to come.
Rain barrels help you conserve water in your Climate Victory Garden. The Environmental Protection Agency (EPA) estimates that lawn and garden watering make up about 40 percent of household water use in summer months, and that a rain barrel will save most homeowners 1,300 gallons of water during that time.
In addition to conserving water, collecting runoff from your roof stops that water from polluting your local watershed. Typically, rainwater will run off of your roof and end up either in a local sewage system or stream. On the journey, the water can pick up pollutants like yard fertilizers, oil and gasoline from street surfaces, animal waste, and more. This polluted storm water runoff will either tax a municipal sewage system or pollute your local watershed. Treatment facilities can easily become overwhelmed and often use energy that has a climate impact.
Learn more about the benefits of using rain barrels in your Climate Victory Garden.
Back to Climate Victory Gardens home.
Have a question that’s not answered here? Or, have advice you’d like to share? Let us know: ClimateVictoryGardens@GreenAmerica.org.

Major beer companies, including Anheuser-Busch, are using harmful pesticides like glyphosate and 2,4-D in their barley and hops. These chemicals threaten human health, devastate pollinator populations, and contaminate our water systems.
We’re calling on The Children’s Place, Carter’s, and H&M to take the next step in sustainability by committing to reduce their use of polyester.
A resource for beginners: Take charge of your finances in four areas - banking, credit cards, property insurance, and investing.
Green America is pushing Artificial Intelligence (AI) companies to use renewable energy so communities aren’t polluted and climate change isn’t made worse by fossil fuels they plan to use.
While Fall is a time to harvest the final veggies in our gardens and put them to bed, it is also an active planting season! Many plants need a dormant period before being able to produce their flowers or fruit. …
Eco-friendly lawns are patches of green space that have the potential to promote clean air, carbon sequestration, and serve as pollinator havens, but only when we abstain from unsustainable products and practices. As you nurture your backyard,…